
How to Fix a Vintage Yamaha Kx580SE Tape Deck: A Step-by-Step Repair Guide
Vintage audio equipment holds a special charm, but time can take its toll. A classic Yamaha KX-580 tape deck might land on your workbench with a common set of problems: it won’t play, and it has a modified power cable. This guide walks you through the complete repair process, from diagnosing a faulty belt to safely restoring the original power connection. You’ll learn how to bring a beloved piece of audio history back to life with basic tools and careful work.
Assessing the Yamaha KX-580 Deck
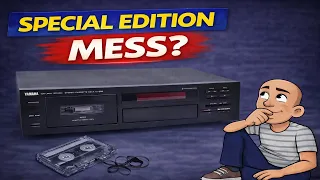
The Yamaha KX-580 Special Edition is a well-regarded tape deck. The unit in this repair was in very good physical condition. However, it had two immediate issues. First, the deck simply did not work. Second, the rear panel had a modified power cable.
This modification replaced the original fixed power cord with a removable “kettle lead” or IEC cable. This hack was done better than most. It used a molded cable and a proper female socket mounted on the chassis. This is safer than methods using electrical tape, solder, or terminal blocks. Even so, part of this repair involved returning this connection to its original, stock configuration.
Diagnosing the Playback Problem
The first step was to find out why the deck wouldn’t play. With the power on, the transport mechanism was attempting to function. The play button was engaged, but the tape heads were not lifting and the tape was not moving. A close listen revealed a motor was trying to run.
A key sign of belt failure in tape decks is a squeaking noise. This often means the belt has hardened and lost its elasticity. A hardened belt cannot grip the pulleys properly. It just slides and polishes them, making them shiny. This was the suspected issue here.
Opening the Deck and Finding the Fault
To investigate, the front panel bezel was removed. This allowed a view of the transport mechanism. It was clear the deck was trying to play, but nothing was moving. The next step was to open the main chassis.
After removing screws from the back and sides, the internal layout was accessible. The problem was found almost immediately. The main drive belt had completely come off its pulleys. It was just dangling around the capstan shaft. This confirmed the diagnosis of old, brittle belts.
Step-by-Step Belt Replacement
Replacing the belt requires removing the transport mechanism. This process is straightforward on the Yamaha KX-580.
- Disconnect and Remove the Mech: Two screws on the top of the mechanism are removed. The flat cable connecting it to the main board is disconnected. It helps to move the head cables to the side. Two more screws at the bottom of the mechanism frame are removed. The entire transport assembly can then be pulled backward and out.
- Disconnect the Heads (Optional): For easier access, you can disconnect the rear tape head. This gives you more room to work on the belt.
- Install the New Belt: The belt path goes around the capstan shaft and under the motor spindle. The best technique is to first hook the belt onto the motor spindle. You push it to the back of the spindle and lift it up to seat it. Then, you bring the belt around and place it onto the capstan pulley. Make sure the belt runs centered on both pulleys. Spin the pulleys a few times to ensure the belt is seated correctly.
- Reinstall the Mechanism: Carefully guide the mechanism back into place. Ensure the head cable routes over the top and away from the eject flap. The mechanism has locator tabs (or “nodules”) that must align with holes in the chassis. When aligned correctly, the screw holes on both sides will line up. Reinsert the two bottom frame screws to secure it.
- Reconnect Cables: Plug the flat cable back into the main board. Reconnect the rear tape head if it was detached. Use the existing cable tie to secure the head wires neatly.
After reassembly, power on the deck. The tape heads should now lift properly. The play function should operate at the correct speed. A quick check of the heads and pinch roller showed they were in good condition with little wear. The pinch roller was still soft and pliable, unlike the hardened belt. A simple cleaning of the heads and tape path was all that was needed.
Restoring the Original Power Connection
Even though the modified power cable was done well, the goal was to return the deck to its original factory state. This process involves a few careful steps.
- Remove the Mounted Socket: The female IEC socket mounted on the chassis must be removed. A specialized grommet removal tool makes this easy. A good pair of flat-nose pliers can also work. The socket is squeezed out from the inside of the chassis.
- Prepare the New Cable: The original-style non-removable power cable is fitted with a new plug. The wires are stripped and connected to the plug terminals.
- Install the Cable Grommet: The chassis hole needs a rubber grommet to protect the cable. These grommets are designed to be squeezed and pushed into place, which is much easier than using pliers.
- Reconnect Internally: Inside the deck, the power cable wires are connected to the correct points on the power supply board. It is important to use the existing cable clamp or strain relief. This prevents the cable from being pulled out and damaging the internal connections.
- Final Check: Before closing the deck, power it on to confirm everything still works correctly. With the new belt and the original power cable restored, the deck is fully functional.
Common Issues with Vintage Tape Decks
This repair highlights two of the most frequent problems found in old tape equipment.
- Perished Belts: Rubber belts dry out, crack, and break over time. They lose their grip and cause playback failures. Replacing all old belts is a standard part of servicing any vintage deck.
- Power Modifications: Previous owners often modify power cords for convenience. While a well-done IEC modification is safe, poorly executed ones can be dangerous. Returning to the original design is often the best approach for long-term safety and value.
Other components, like the pinch roller, can also harden with age. This deck’s roller was still good, but a hardened roller will not grip tape properly and can cause speed issues or damage.
Conclusion
Repairing a vintage Yamaha KX-580 tape deck is a rewarding project. The process is logical and very achievable. The most common fault is simply worn-out belts. The transport mechanism in this model is designed for serviceability. With care, you can remove it, replace the belts, and have the deck playing again.
The key to a successful repair is methodical diagnosis and careful reassembly. Always check the simple things first, like belts. Pay close attention to how cables are routed and where locator tabs align. For safety, address any questionable power modifications. Use proper strain relief on internal wiring.
This guide shows that you don’t need to be an expert to tackle basic tape deck restoration. With common tools and patience, you can save a classic piece of audio gear. You give it a new lease on life for many more years of music enjoyment. Whether you’re a hobbyist or a collector, understanding these steps empowers you to preserve the sound of a past era.