
How to Restore a Filthy Sony TC-KB920QS 3-Head Tape Deck: A Complete Repair Guide
Sometimes, a piece of audio history deserves a second chance. This was the case with a Sony 3-head cassette deck that arrived in a shocking state. It was covered in grime, dust, and even had a tape shredded inside it. This guide walks you through the full process of bringing such a machine back to life. We will cover deep cleaning, belt replacement, and critical mechanical fixes. By the end, you’ll see how to save a rare and valuable piece of hi-fi equipment from the landfill.
First Impressions of a Dirty Deck
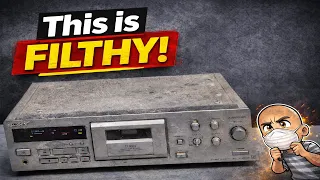
The Sony deck was in terrible shape. It was extremely dirty, coated in a layer of crud and dust. The condition was so poor it looked like it might have come from a recycling center or was pulled from a skip. This level of filth strongly suggested the deck had not been tested before sale.
A quick test showed the machine had serious problems. When play was pressed, it would chew up the tape instead of moving it correctly. The audio was also not working during this test. It was clear the deck needed a full mechanical service.
Step 1: Initial Cleaning and Inspection
Before any repair work, a thorough cleaning is essential. Using compressed air or an electric air blower is a great first step. This tool blows out loose dust and debris from inside the electronics.
Even after blowing it out, the deck was still dirty. Key parts like the pinch roller and capstan were covered in grime. The pinch roller was especially bad. It was hard, brittle, and had old tape wrapped around it. This part would need to be replaced.
Step 2: Disassembling the Front Panel and Mechanism
To access the internal parts, you must remove the outer case and front panel.
- Remove the case screws. This model has two screws on the top in addition to the usual side screws. There is often one on the back as well.
- Remove the front panel. Tip the deck on its side to access the screws along the front edge. There is also a middle screw that holds the mechanism to the chassis. Do not forget this one.
- Disconnect internal cables. Once the case is off, remove the screws on top of the front panel bezel. Then, carefully disconnect the ribbon cables and the power cable. Also, remove the screw holding an earth lead.
- Remove the mechanism. After the cables are free, you can slide the front panel out. Then, remove the two screws holding the tape mechanism in place.
Step 3: Manually Ejecting a Stuck Tape and Removing the Mechanism
Sometimes, the tape hatch is jammed and won’t open. You must manually release it.
- Locate a small white tab inside the mechanism.
- Push the tab in. You should hear a click.
- Find the capstan (the large round part with a belt). Turn it by hand. You will feel the main internal cog turn.
- After a few turns, push the white tab again. You may need to repeat this process two or three times until the mechanism clicks fully into place.
- Once it clicks, the hatch will open.
In this case, opening the deck revealed a tape that had been completely eaten. The damaged tape was wrapped around the pinch roller. With the hatch open, you can slide the cassette holder out through the front. Wiggle it gently to free any audio cables connected to the head underneath.
Step 4: Replacing the Pinch Roller
The old pinch roller was ruined. Replacing it is straightforward.
The pinch roller assembly has a small tab on the bottom. Use a flat-blade screwdriver to bend this tab back and pull the entire assembly up and out. Once removed, you can pry the old roller out of its bracket.
For a deck this dirty, it is often easier to replace the whole clean bracket with a spare if you have one. If not, clean the old bracket thoroughly with isopropyl alcohol and a microfiber cloth. A foam cleaner is also excellent for removing old belt residue and tape ferrite grime. Press the new roller and bracket back into place until it clips.
Step 5: Cleaning the Micro Switches
Tape decks use small micro switches to detect different tape types and functions. Dirty switches cause many problems.
These switches have plastic covers that wiggle off. Once removed, spray contact cleaner directly into the switch. Be liberal with the spray. Wiggle the switch blade several times to work the cleaner in. Then, pop the plastic cover back on. This simple step can fix issues with tape detection and recording functions.
Step 6: Replacing the Belts and a Missing Spring
Old rubber belts degrade and cause the deck to malfunction. Replacing them is a key part of restoration.
- Access the belts. Remove the screws on the back of the mechanism’s circuit board. There are usually three. Two hold the board to the metal chassis, and one is in the middle. Then, unclip the plastic parts to reach the belts.
- Check for missing parts. During this process, a vital tension spring was found missing. It was loose inside the case, a sign someone had worked on the deck before. This spring must be reinstalled for the mechanism to work.
- Install the spring. The spring attaches to two white plastic pieces. Hook one end onto a bottom tab, stretch it over a round black post, and hook the other end onto a top tab. This creates the correct tension.
- Reset the mechanism. With the spring installed, you can reset the deck by turning the capstan and pushing the side release tab until it clicks three times. This returns it to a neutral position.
- Install new belts. Place the new play/rewind/fast-forward belt over the capstan pulley. Route it carefully between two small plastic prongs on the motor. Then, fit the belt over the motor pulley. A second, smaller belt drives the capstan itself. Ensure all belts are seated correctly on their pulleys.
Step 7: Final Cleaning and Reassembly
Before putting everything back together, take the chance to clean the disassembled parts.
Use foam cleaner on the mechanism and the inside of the front panel. This final clean removes the last of the grime. Reassembly is the reverse of disassembly.
- Slide the cassette holder back into the front panel and close it.
- Reinstall the mechanism with its two screws.
- Reconnect all ribbon cables and the power cable to the main board. Check for any damaged cables. Trimming a frayed end can sometimes fix a connection issue.
- Do not forget to reconnect the earth lead and the mains transformer wire.
- Replace the two screws that hold the mechanism to the top of the front panel bezel.
- Finally, clip the outer case back on.
Testing the Restored Deck
After reassembly, power the deck on. Insert a test tape you are willing to risk. The buttons for play, rewind, and fast forward should now work smoothly. The tape should transport correctly without chewing or spilling.
While the internal audio wasn’t captured during this repair, the core mechanical functions were fully restored. The deck went from a filthy, broken machine to a fully operational piece of equipment.
Conclusion: Why Save an Old Tape Deck?
This Sony 3-head deck was a challenge. It was very dirty and broken. However, it was worth the effort to repair. Decks like this are quite rare. They were among the last cassette decks Sony made before they stopped producing hi-fi equipment.
Like vinyl records, cassette tapes have seen a resurgence in interest. Many people still enjoy the format. Keeping these old decks working preserves audio history. It prevents them from becoming electronic waste.
While the deck was cleaned, its worn exterior shows its age. Some might call it “polishing a turd.” Yet, the goal was not to make it look new. The goal was to make it work perfectly again. This repair proves that even the most discarded piece of gear can have its function restored. With some patience, the right tools, and this guide, you can save a classic tape deck and enjoy it for years to come.
Found an old tape deck? Don’t throw it out. Consider giving it a repair instead.