
Fix your Marantz CD52 Loading issues
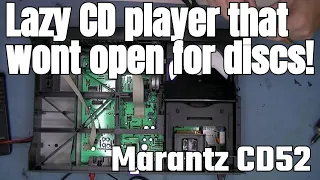
Do you have an old Marantz or Philips CD player that won’t open or load discs? The problem is often a small, broken plastic gear inside the machine. This is a very common fault with these older CD players. The good news is that fixing it is a cheap and straightforward do-it-yourself project. This guide will walk you through the entire process of replacing that worn-out loading gear, saving your equipment from the trash and bringing your music collection back to life.
A Common Problem with a Simple Fix
Many CD players made by Philips and sold under brands like Marantz use a similar internal mechanism. Over time, a specific plastic loading gear inside these players becomes brittle. The teeth on the gear can wear down completely, snap off, or even cause the gear to split in half. This stops the disc tray from opening properly.
You don’t need to be an expert to fix this. The replacement part is inexpensive, often costing around six or seven pounds. With some basic tools and careful attention, you can complete this repair in under an hour.
Tools and Parts You Will Need
Before you start, gather the right tools and the new part. Having everything ready will make the repair smoother.
Essential Tools:
- A small Phillips head screwdriver.
- A plastic spudger or a flat, non-metallic tool for prying (a guitar pick works well).
- A clean, soft cloth for lens cleaning (optional).
The Critical Part:
- One replacement loading cog gear for your specific Philips-style CD mechanism. You can find these online by searching for “Philips CD loading gear” or “CDM gear.”
Step-by-Step Repair Instructions
Follow these steps carefully to take apart your CD player, swap the broken gear, and put everything back together.
Step 1: Open the CD Player Case
First, you need to get inside the machine. Look at the back of the CD player. You will see several case screws. Use your Phillips screwdriver to remove them all.
Once the case screws are out, you can lift the lid off. Place it safely aside. You will now see the internal mechanism.
Step 2: Remove the Front Panel and Disc Tray
The goal is to get the disc tray out so you can reach the broken gear.
- Locate and remove several small “torque” screws along the top of the metal frame inside the player. Also, remove two more screws underneath the unit.
- Gently push the disc tray open with your fingers just a little bit.
- Find the clips holding the front plastic panel to the tray. Carefully release these clips with your spudger and bend the front panel away. You do not need to take it all the way off.
- Continue to pull the tray out smoothly. You will need to remove a small clamp piece that is attached to a spring. This clamp just hooks onto a pin.
- Once the clamp is off, you should be able to slide the tray all the way out. It may fall off easily once it reaches a certain point.
Step 3: Replace the Broken Loading Gear
With the tray removed, you can now see and replace the faulty part.
- Look for a small plastic gear near where the tray was. You will see a small metal tab holding it in place.
- Bend this tab carefully. The entire old gear assembly should then pull straight out.
- Inspect the old gear. You will likely see that all the teeth are worn down or that the gear has cracked. This is proof of the problem.
- Before installing the new gear, check the area for any leftover bits of broken plastic. Clear them out.
- Take your new replacement gear. Place it over the spindle and seat it back into the slot. Make sure the little tab clicks or fits into place. The gear should spin freely once installed.
Step 4: Reassemble the CD Player
Now, you will put everything back together. This is mostly the reverse of the disassembly steps.
- Take your disc tray. Bend it slightly past the two small retaining pins inside the player.
- Hold the bottom of the tray up as you start to slide it back into the machine. It is very important to line up the pins correctly. If the tray won’t go in, check the alignment.
- As you slide the tray in, clip the front panel back onto it at the same time.
- Hook the small clamp with the spring back onto its pin. Press it down so it clamps into place.
- Before putting all the screws back in, plug in the player to do a quick test. Press the open/close button. The tray should open smoothly. Insert a disc and press play to see if it loads and spins.
Step 5: Final Reassembly and Cleaning
If your test is successful, finish putting the machine together.
- Unplug the player again for safety.
- Replace all the torque screws: three along the top and two underneath.
- Put the lid back on and screw in all the case screws from the back.
While you have the machine open, it’s a good chance to give the laser lens a quick clean. Use a soft, dry cloth. Gently wipe the lens. Do not press hard. If the lens already looks shiny and clean, you may not need to do this.
Troubleshooting Common Issues
- Tray Won’t Slide Back In: This almost always means the tray is not lined up with the internal guide pins. Remove the tray and try again, paying close attention to how it fits.
- Machine Still Doesn’t Work: Double-check that the new gear is seated fully and can spin. Ensure the spring clamp is attached correctly, as this provides tension for the loading process.
- Disc Won’t Play: If the tray opens but the disc won’t play, the laser lens might be dirty. Give it a careful clean. The problem could also be a different fault unrelated to the loading gear.
Conclusion: Enjoy Your Revived Music
That’s all there is to it! You have now fixed one of the most common failures in older CD players. By replacing a single, cheap plastic gear, you have saved a piece of electronics from being thrown away. This keeps your music playing and is a small win for sustainability.
Remember, the key steps are: open the case, remove the tray carefully, swap the brittle old gear for a new one, and reassemble while checking your alignments. With patience, anyone can do this repair. Now, pop in your favorite CD and enjoy the music from your newly rescued player.