
How to fix a Sony TC-WE475 cassette deck
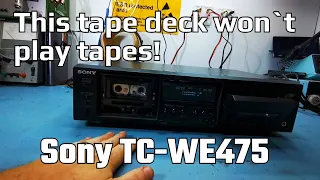
How to Fix a Cassette Deck That Won’t Fast Forward or Rewind
Cassette tapes are coming back into style. Many people enjoy the classic sound of analog music. But what do you do when your old tape deck stops working right? A common problem is when the deck plays music but won’t fast forward or rewind. This guide will show you the simple repair that can often save your deck. We will follow a real technician’s process. You will see how to open the deck, find the problem, and fix it with just a couple of new parts. This guide is for anyone who wants to save a classic piece of audio gear.
Diagnosing the Problem
The customer reported a clear issue. The Sony tape deck would play music in both directions. But it would not fast forward or rewind at all. This points to a very specific mechanical problem. It is not an electronic fault with the sound.
When the technician first tested the deck, playback worked fine. Both forward and reverse play modes engaged correctly. Pressing the rewind or fast forward buttons, however, did nothing. The transport mechanism did not move. The deck even seemed to get confused. It started to reset itself. This is a key clue. The machine could not tell what mode it was supposed to be in. This happens when a key part slips and does not engage.
The most common reason for this specific failure is old, stretched belts. Inside every cassette deck are rubber belts. They connect the motor to the various pulleys and gears. These belts drive the playback functions, and they also drive the fast forward and rewind functions. Over many years, these belts rot, stretch, and become shiny.
Opening the Cassette Deck for Repair
The technician started by removing the outer case. This is usually simple. It often involves removing a few screws from the sides and rear of the unit. Once the case is off, you can see the internal mechanism.
It’s important to be careful and gentle. You should always unplug the device first. Be mindful of any wires connected to the case. The inside of this Sony deck was very clean. It showed the deck had been cared for over the years. This is good news. It means the repair can be straightforward.
Finding the Faulty Belts
With the deck open, the technician could inspect the belts. There are usually two main belts to check in a dual cassette deck.
- The Capstan Belt: This belt drives the capstan motor. It is critical for playback speed during normal music playing.
- The Mode Selector (or Main Drive) Belt: This belt drives the mechanism that changes modes. It tells the deck to switch between play, fast forward, and rewind.
The technician checked both. The capstan belt felt okay. But the mode selector belt was clearly the problem. When the technician showed it, the belt was very loose and baggy. It had also become shiny and slick. This belt was so stretched it could not grip the pulleys. When you pressed rewind, the motor would spin, but the belt would just slip. That’s why nothing happened.
How to Replace the Belts
The repair process for this Sony model is very simple. The belts are easy to see and reach. This is not always the case with all electronics. Here is the basic process the technician used.
Step 1: Remove the Old Belts
The belts simply loop around a motor pulley and a plastic pulley. You do not need to remove other parts. To get a belt off, you slightly twist the top of the motor. This releases tension on the belt. Then you can pop it off the plastic pulley. The old belt came off easily. It was so stretched you could see it had lost all its strength.
Step 2: Install the New Belts
The technician used new replacement belts of the correct size. Putting the new belt on is the reverse of removal. You loop it under the plastic pulley first. Then you wrap it around the motor pulley. You may need to twist the motor slightly again to get enough slack. The key is to make sure the belt is seated in the grooves on the pulleys. You must also check that the belt has no twists in it. A twisted belt will not run smoothly. The technician replaced the capstan belt as well. This is good practice. If one belt is old, the other is likely the same age.
Testing the Repair
After the new belts were installed, the technician did not put the case back on right away. First, it was time to test. This is a very important step.
The deck was powered on. The technician tested all the functions.
- Forward Play: Worked perfectly.
- Reverse Play: Worked perfectly.
- Fast Forward: Now worked correctly.
- Rewind: Now worked correctly.
Both sides (Deck 1 and Deck 2) of the dual cassette deck were tested. All functions were restored. The deck no longer got confused and reset itself. The new belts provided the grip and tension the machine needed. They allowed the mode selector mechanism to work as designed.
Final Steps and Conclusion
With the repair confirmed successful, the technician finished the job. The outer case was screwed back onto the deck. As a final touch, the technician gave the tape heads a good clean. Dirty heads can cause poor sound quality. This extra step ensures the deck is fully ready for the customer. The entire repair saved the deck from being thrown away.
Fixing a cassette deck that won’t fast forward or rewind is often very simple. The problem is almost always old, stretched belts. This guide showed the repair process from start to finish. You saw the diagnosis, the simple belt replacement, and the successful test.
The key takeaway is that these classic machines can often be fixed. You do not need to be an expert. You need the right replacement parts and some care. If your deck has the same symptoms, this repair might be all it needs. You can bring your old music back to life. You can enjoy the warm sound of cassettes for many more years.