
How to Fix a Vintage Sony CMT-MD1 Mini Hi-Fi System
Found a strange-looking music system at an auction? This blog post chronicles a cheap auction find: a unique Sony shelf system. The speakers detach like a boombox, but it plugs into the wall. We’ll run through a full inspection and fix its main problem.
A Look at a Strange and Rare Sony System
The system is a bit of a mystery piece. It looks a bit like a boombox from the front. The key feature is its removable speakers. They hook onto the sides of the main unit. You can also take them off and position them separately using the coiled speaker cable.
The unit itself is quite heavy, about five or six kilograms. It feels well-built. An original molded plug was still attached, a good sign it hadn’t been tampered with. The top panel had some marks and scratches, showing its age.
Initial Power-Up and Function Check
After plugging it in, the system powered on. The display was a bit faded, but it showed life. The amplifier worked, producing static on the tuner. The front panel controls included selections for MiniDisc, CD, and Tuner. There was also a “Tape” function, but no physical tape deck.
The rear panel had tape input and output connections. This allowed for connecting an external tape deck. A cooling fan inside was also running, another good sign.
Testing the CD Player
The top panel turned out to be the CD player lid. When pressed, a motor could be heard running, but the lid would not flip open. This was the first clear problem.
By gently forcing the lid open, a test CD could be inserted. Before playing, the laser lens was given a quick, safe wipe with a microfiber cloth. This removes dust without risking damage from cleaning fluids. The CD spun up and read the disc. It even skipped between tracks correctly. The CD mechanism worked, but the lid would not open on its own.
Testing the MiniDisc Player
A MiniDisc was inserted into the player next. The system took the disc in and read it. This was a positive sign. It’s important to note that if you play an MDLP-formatted disc in a non-MDLP player, it will read but produce no sound. This test confirmed the MiniDisc transport was functional.
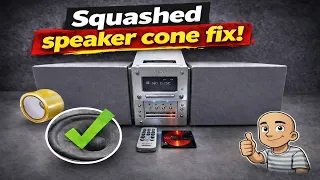
Speaker Condition and a Quick Fix
The speaker grilles were in decent shape. However, one speaker cone had been pushed in. This is a common issue and often easy to fix.
Here’s a simple trick:
- Get a piece of sticky tape.
- Press it gently onto the pushed-in area of the cone.
- Leave it for a few minutes to adhere well.
- Pull the tape straight off.
The tape’s adhesive gently pulls the cone back into shape. This works well on paper cones and soft-dome tweeters. Be careful and the results can be great.
Opening the Unit to Find the Problem
With the main issues located, it was time to open the chassis. The speakers and their wires were removed first. Several screws on the bottom and sides needed to be taken out. The internal build quality was good, with a large, “meaty” transformer inside for power.
Disassembly Tip: With older electronics you haven’t worked on before, the order of taking it apart is often a puzzle. You have to proceed slowly and figure it out as you go.
The front panel needed to be removed to access the CD mechanism. More screws were found underneath the unit and behind the front panel. Finally, the entire top assembly containing the CD player could be lifted out.
The Simple Culprit: A Missing Belt
Inside, the problem was obvious. A small pulley on the CD mechanism was completely bare. The belt that should drive the lid opening mechanism was gone. There was no old belt or residue left behind. It had simply perished and disappeared over time.
This is a very common fault in old CD players, cassette decks, and MiniDisc units. Rubber belts dry out, stretch, or break.
The fix was straightforward:
- A new belt of a similar size was selected.
- It was fitted onto the motor spindle and the pulley.
- The belt needed to be nice and tight for proper operation.
Reassembly and Final Testing
Putting the unit back together required reconnecting all cables and replacing all screws. Once reassembled, the moment of truth arrived.
Powering the system on showed the display and volume worked. Selecting CD mode and pressing the open button yielded perfect results. The lid opened smoothly and quickly. A CD was inserted and played without any issues. The MiniDisc player also continued to work correctly.
The total cost for this project was very low—just a few pounds at auction plus a cheap replacement belt. A piece of electronics was saved from being thrown away.
Conclusion: Repairing Old Electronics is Rewarding
This Sony mini hi-fi system was a great find. It combined unusual design with solid performance. The repair needed was minor but crucial: replacing one small rubber belt.
The key takeaways from this project are:
- Always inspect carefully. Check for power, basic functions, and physical damage first.
- Common faults are often simple. Issues with doors not opening are frequently caused by old belts.
- Cleaning is key. A simple wipe of a laser lens with a dry microfiber cloth can solve many playback issues.
- You can fix minor damage. Tricks like the tape method can repair pushed-in speaker cones.
Fixing old gear like this is satisfying. It keeps useful technology out of landfills. It also gives you a unique piece of history for a very low cost. With some basic tools and patience, you can bring old electronics back to life.
Have you found and fixed an old piece of audio equipment? Share your story and keep the repair spirit alive.