
How to Fix an HP Laptop Battery Error: A Step-by-Step Guide
Is your HP laptop showing a scary battery error and shutting down? This common problem often means your laptop needs a new battery. Instead of buying a brand-new computer, you can fix it yourself. This guide walks you through the simple process of replacing an old, swollen battery with a new one, just like in the popular YouTube tutorial.
Identifying the Battery Error
The first sign of trouble is an error message on the screen. When you turn on the laptop, it might display a warning. The message says the system has detected the battery’s storage capacity is too low. The laptop might start to boot up. Then it suddenly shuts off because the old battery cannot hold enough power.
This means the battery has failed. It can no longer keep your computer running. The only real fix is to install a new battery.
Shopping for the Right Replacement Battery
The next step is to find the correct battery for your HP laptop. Online stores like Amazon have many options. Be careful when you shop. Different sellers list batteries that look the same in photos. However, prices and customer reviews can be very different.
Do not just pick the cheapest option. Look at the reviews from other buyers. Choose a battery with good feedback. It is smart to avoid the most expensive and the cheapest choices. A mid-priced battery from a seller with strong reviews is often a good bet.
Most importantly, you must match the battery model number. For the laptop in the video, the correct battery was marked “HR3 XL.” Always double-check your own laptop’s battery model before you buy.
Step 1: Opening the Laptop Case
First, make sure the laptop is completely powered off and unplugged.
Look at the bottom of the laptop. You will see several small screws holding the back panel on. These are usually standard Phillips-head screws. Remove all the screws with a small screwdriver. Keep them in a safe place.
Sometimes, a screw or two might already be missing, especially if the laptop has been opened before. This is okay. You just need to remove the screws that are there.
Once the screws are out, you can gently pry off the bottom panel. It should pop off easily.
Step 2: Finding and Removing the Old Battery
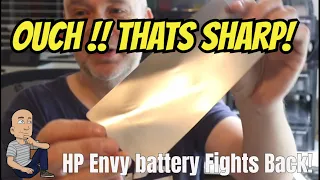
With the panel off, you will see the laptop’s internal parts. The battery is a large, rectangular block. It is often secured with more screws. In this HP model, there was a thin metal shield taped over the battery. This shield is very sharp. It can cut your fingers like a paper cut, but deeper.
Warning: Handle any metal covers with extreme caution. Peel them back slowly and be aware of the sharp edges.
Under the cover, you can see the old battery. If it has failed, it might look swollen. The video showed a battery where the individual cells were bulging. This is a clear sign the battery is bad and needs replacement.
Unscrew the battery from its mounting points inside the laptop. Gently disconnect any cables if they are attached. Then, you can lift the old battery out.
Step 3: Installing the New Battery
Take your new replacement battery. Make sure it looks just like the old one and has the same model number.
Place the new battery into the empty space. Line up the screw holes. A correct battery will fit perfectly, and all the mounting points will align. If the holes do not line up, you may have the wrong battery model. In the video, the first battery ordered did not fit, so a second, correct one was ordered.
Once the battery sits correctly, screw it back into place. Be careful not to overtighten the screws.
If your laptop has that sharp metal shield, carefully place it back over the new battery. Then, you can put the laptop’s bottom panel back on.
Step 4: Testing Your Fix
Now for the moment of truth. Screw the bottom panel back on using the screws you saved.
Open the laptop lid and press the power button. If you hear the fans start to spin, that’s a great sign. The screen should light up and begin to boot.
Because the battery was disconnected, the computer might ask for the date and time. This is normal. Just click “OK” or set the correct time.
If everything works, the battery error message will be gone. Your laptop will now run on battery power without shutting down. You have successfully fixed the problem!
Conclusion: Saving Money and Extending Your Laptop’s Life
Replacing a laptop battery is a simple DIY task. It can save you hundreds of dollars compared to buying a new computer. The key steps are easy: identify the error, buy the correct model, swap the old, swollen battery for the new one, and test it.
Always remember to be safe. Handle sharp internal parts with care and make sure the laptop is off. With a small investment in a new battery and about 30 minutes of your time, you can make an old laptop feel new again. This simple repair can keep your device running for years to come.