
OSEE GOSTREAM 4K – A Simple Way to Switch Between Two Cameras for Video Recording
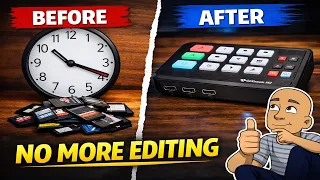
Recording with multiple cameras can make your videos look more professional. But it often creates a lot of extra editing work. You have to manage files from different memory cards. You also have to sync and cut between cameras in your editing software. I found a device that tries to solve this problem. It is a small HDMI switcher and capture card all in one unit. This blog post will explain what this device does and how I use it in my workshop. I will also talk about its pros and cons based on my real-world testing.
What This HDMI Switcher and Capture Card Does
The main goal of this device is to save time. It lets you connect two cameras at the same time. You plug them in, and it sends the video to your computer with one USB cable. You can switch between the cameras while you record. This means you don’t have to edit the cuts together later.
The box comes with a few helpful items:
- A USB cable for connecting to your computer.
- A small carry case for the device.
- A user guide.
Once everything is connected, you control the video feed from a small pad. You can easily switch between the two camera inputs with the press of a button. It also lets you create different screen layouts without any editing software.
Key Features for Multi-Camera Recording
This unit has several modes that are useful for creators. They help you show different angles at the same time.
Live Switching Between Cameras
You are not locked into one view. With a simple button press, you can change which camera is the main, full-screen feed. This is perfect for moving from a wide shot to a close-up detail shot instantly.
Picture-in-Picture (PIP) Mode
This mode lets you show a small window from one camera over the main feed from the other camera. You can even adjust the size of the smaller window. For example, you could have a close-up of your hands working in the small window while the main screen shows your face.
Side-by-Side Mode
If you need to compare two things, the side-by-side mode is great. It splits the screen evenly between both camera feeds. You can also swap which camera is on the left or right side.
Use as a Standard Capture Card
This device is not just for cameras. You can also use it to capture video from other HDMI sources. This includes things like DVD players, video game consoles, or old camcorders. It turns them into a digital signal your computer can record.
My Workshop Setup with the Switcher
I use this device to film repair projects in my workshop. My setup uses two specific cameras for different jobs.
Camera 1: The Main Front Shot
This camera is positioned to show the workbench and the equipment I am fixing. It gives the viewer a clear, direct view of the work area.
Camera 2: The Top-Down Shot
I use a small JVC camera for this. It is mounted above the workbench. This “top shot” angle is perfect for showing detailed work, like soldering small components. Before using this switcher, I recorded this camera to its own memory card.
Now, both cameras are plugged into the back of the switcher. A single USB cable runs from the switcher to my computer. I use free software called OBS to record the combined video feed. I also plug my DJI wireless microphone directly into the computer. This gives me better audio than the built-in microphones on the cameras.
The Benefits: How It Saves Time and Effort
The biggest advantage of this system is that it reduces editing time. My old process was much more complicated.
The Old, Slow Way
- Record Camera 1 to its SD card.
- Record Camera 2 to its own SD card.
- Remove both SD cards and transfer the files to my computer.
- Open editing software (like PowerDirector).
- Import both video files and one audio file onto separate tracks.
- Manually cut and switch between the camera angles to build the final video.
The New, Faster Way
- Hit record in OBS software.
- Press a button on the switcher pad to change angles while I work.
- Stop recording. The file is already a single video with all my camera switches made live.
This cuts out many steps. It makes the whole process from filming to a finished video much quicker.
The Drawbacks and Limitations
This device is very helpful, but it is not perfect. For its price, you have to accept some compromises.
No Individual Audio Muting
You can plug an external microphone into the front of the unit. However, you cannot mute the audio coming from the HDMI cables of your cameras. This means you might record audio from both cameras at the same time, which can cause echo. My solution was to mute all audio on the switcher. I then use my separate DJI microphone plugged into the computer for clean audio.
No Preview Monitor
The unit does not have a “preview” output. You can only see the camera feed that is currently “live” on your main screen. You cannot see what the other camera is seeing in a separate window. This makes it a little harder to frame your shots perfectly before you switch. This is a common limitation for budget switchers.
No Internal Recording
This device does not save video by itself. It must be connected to a computer or another recording device. You need software like OBS on your PC to capture the final video.
Is This Switcher Right for You?
This device is a good, simple solution for a specific need. It works well if you want to use two cameras and switch between them live.
You might like this switcher if:
- You record with two cameras and want faster editing.
- You need basic picture-in-picture or side-by-side modes.
- You are on a budget and want a simple tool.
- You also want a capture card for game consoles or other HDMI devices.
You might want to look for a different device if:
- You need to mute the audio from your cameras separately.
- You require a preview screen to see your other camera angles.
- You plan to use more than two cameras in the future.
- You want a device that can record video without a computer.
My Plans for the Future
I am happy with this unit for now. It does make my workflow smoother. For about $150 to $160, it adds useful features to my workshop.
However, as my channel grows, I will likely upgrade. I will look for a switcher with more inputs. This would let me add a third camera for talking directly to the audience. I could also add a feed from my digital microscope or my computer screen to show service manuals.
A more advanced unit would also have a preview function. This would help me set up shots better before switching to them.
Final Thoughts on Multi-Camera Switching
Using a multi-camera setup makes videos more engaging. It lets you show details and wide shots without awkward editing later. This HDMI switcher and capture card is a helpful first step into that world.
It proves that you don’t need expensive gear to improve your videos. You just need a smart setup. This device saves hours of editing by letting you make cuts live as you film.
If you film with two cameras, this little box is worth considering. It can turn a complex, multi-step process into a simple, one-step recording session. Try it out if you want to spend less time editing and more time creating.
Have you tried using a video switcher? Share your experience or ask questions in the comments below!